Appendix B: Troubleshooting
This chapter contains basic troubleshooting information. Refer to 4. Maintain the GrainGage for additional information on maintaining your system.
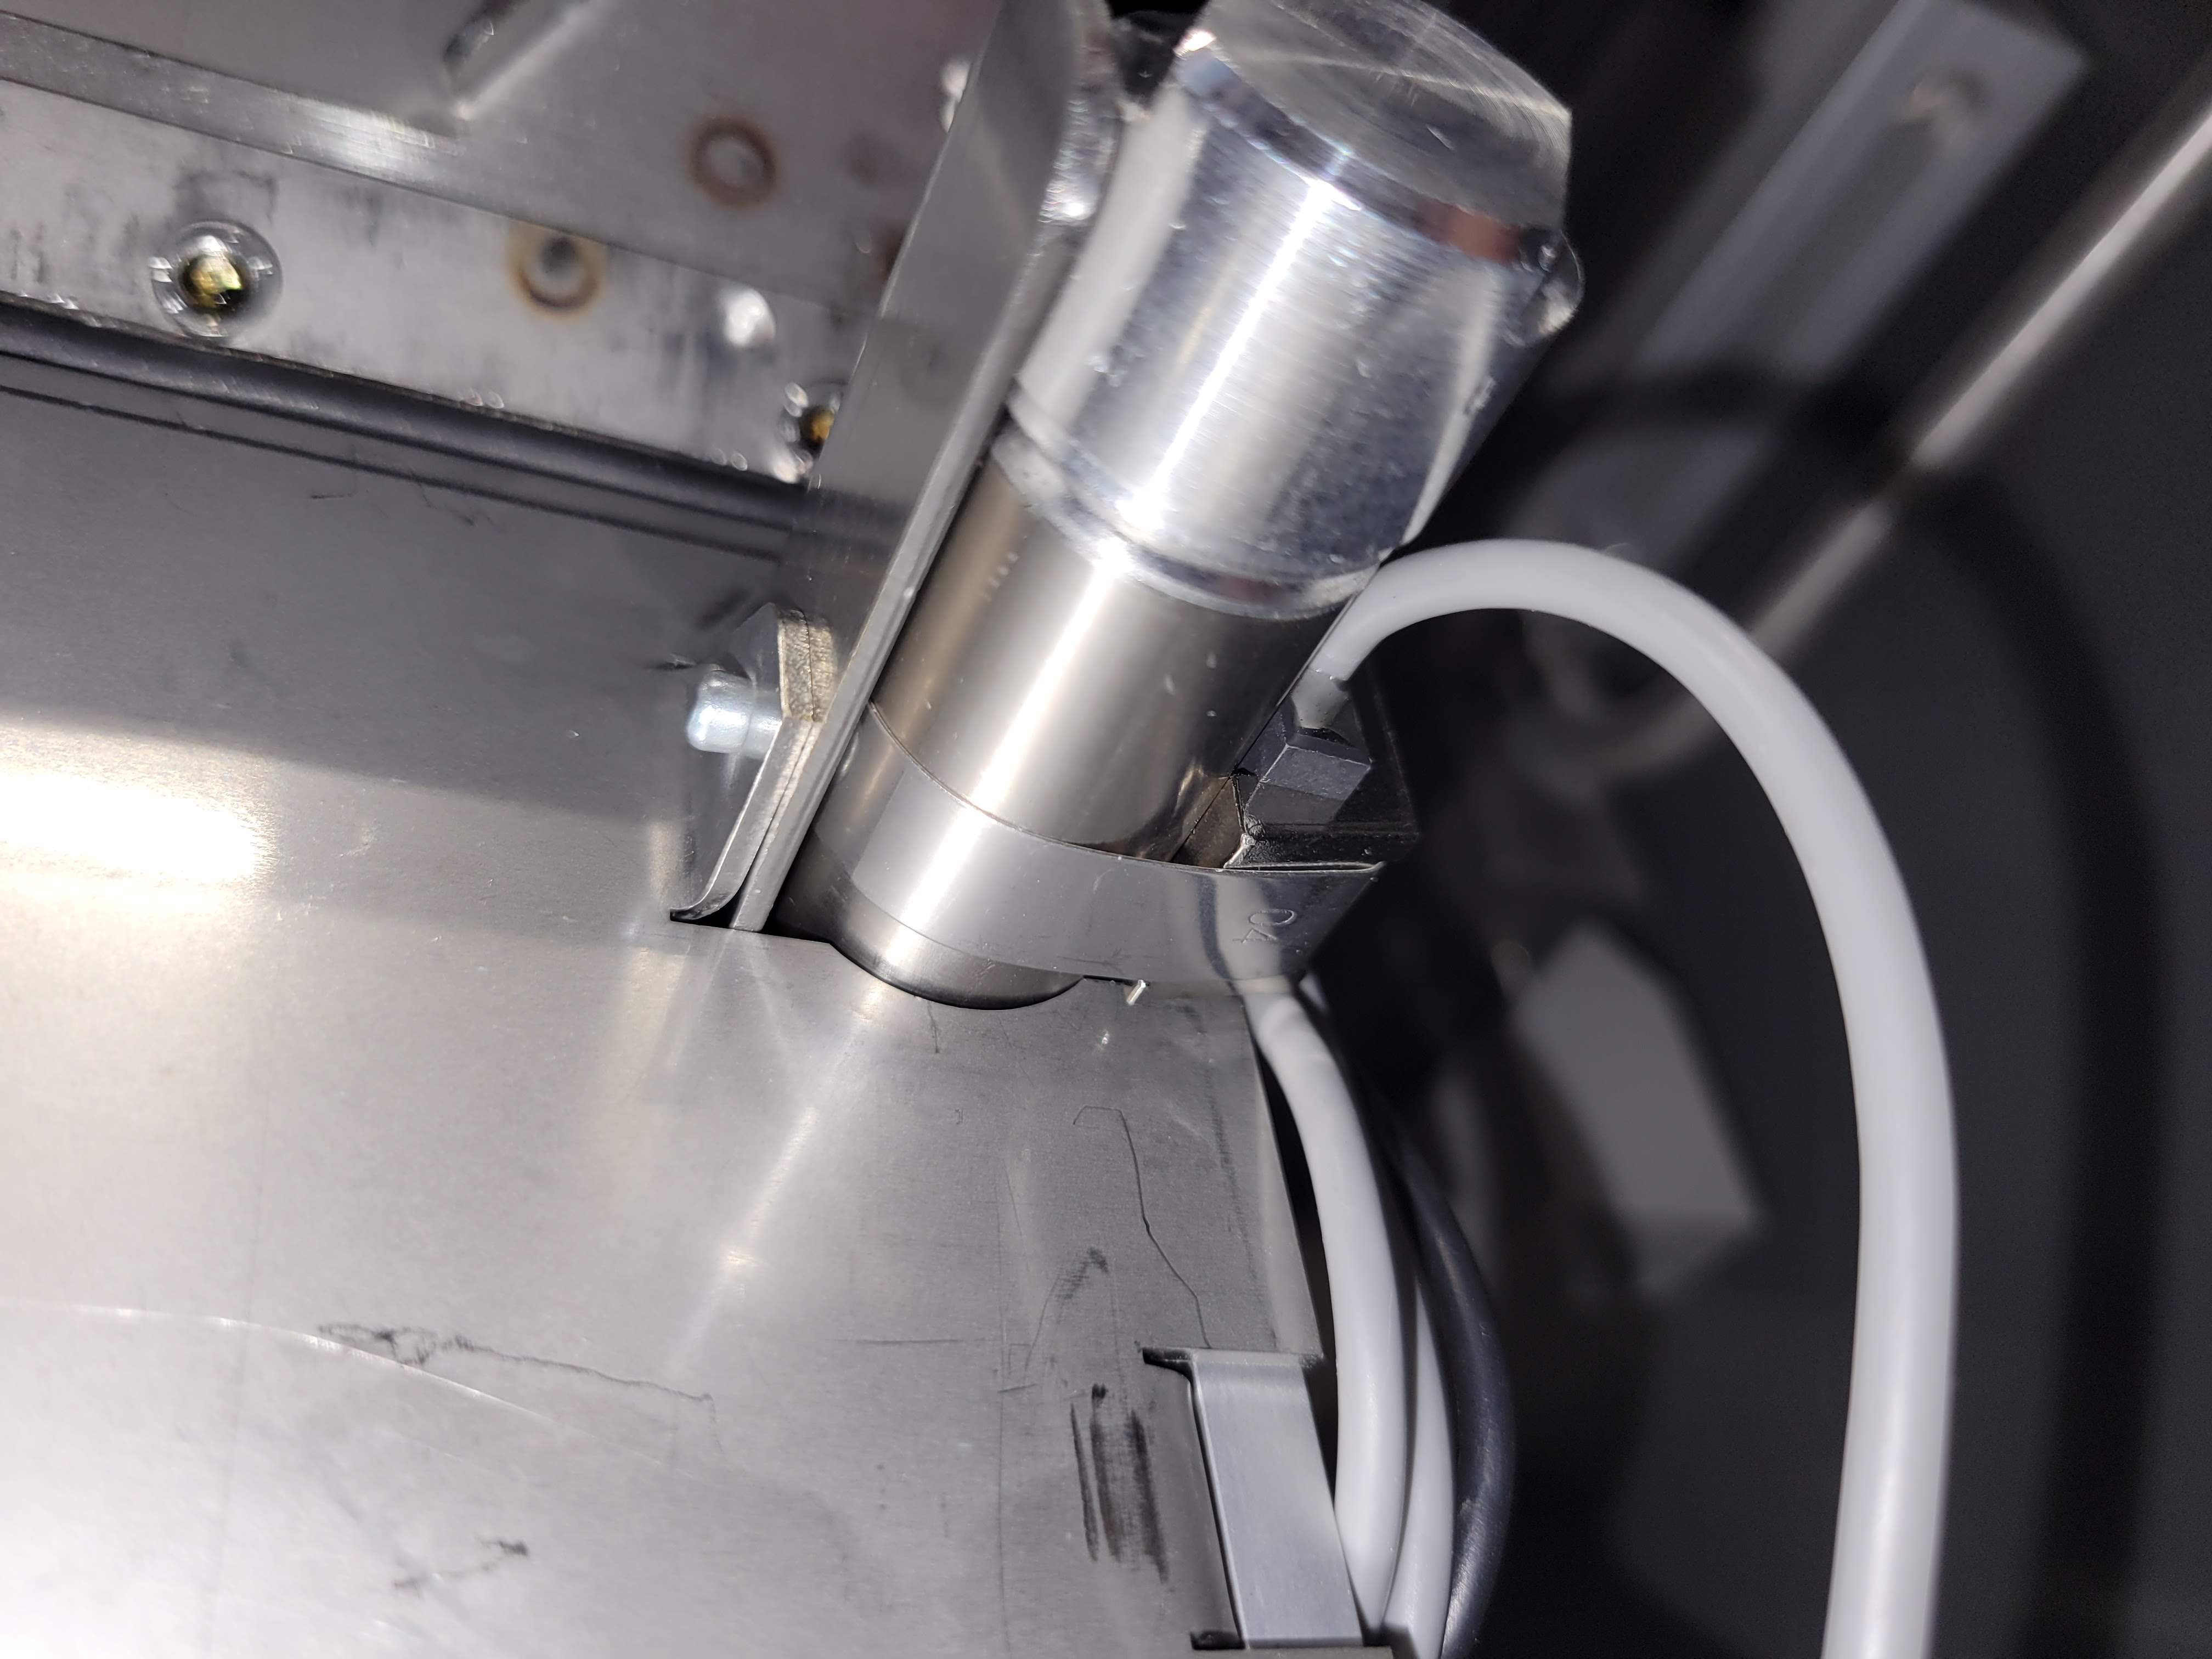
Troubleshooting SCiO Sensor (H3 only)
To troubleshoot the SCiO Sensor,
- Check the SCiO glass dome for damage.
- Clean the SCiO glass dome with glass cleaner and a microfiber cloth.
- Ensure the SCiO serial to USB cable (PN 31517) and the SCiO Sensor junction cable (PN 30712) are undamaged and properly connected between the GrainGage and rugged tablet.
- Ensure the SCiO Sensor junction cable (PN 30712) is properly routed to the SCiO Sensor and does not impede the movement of the test chamber.
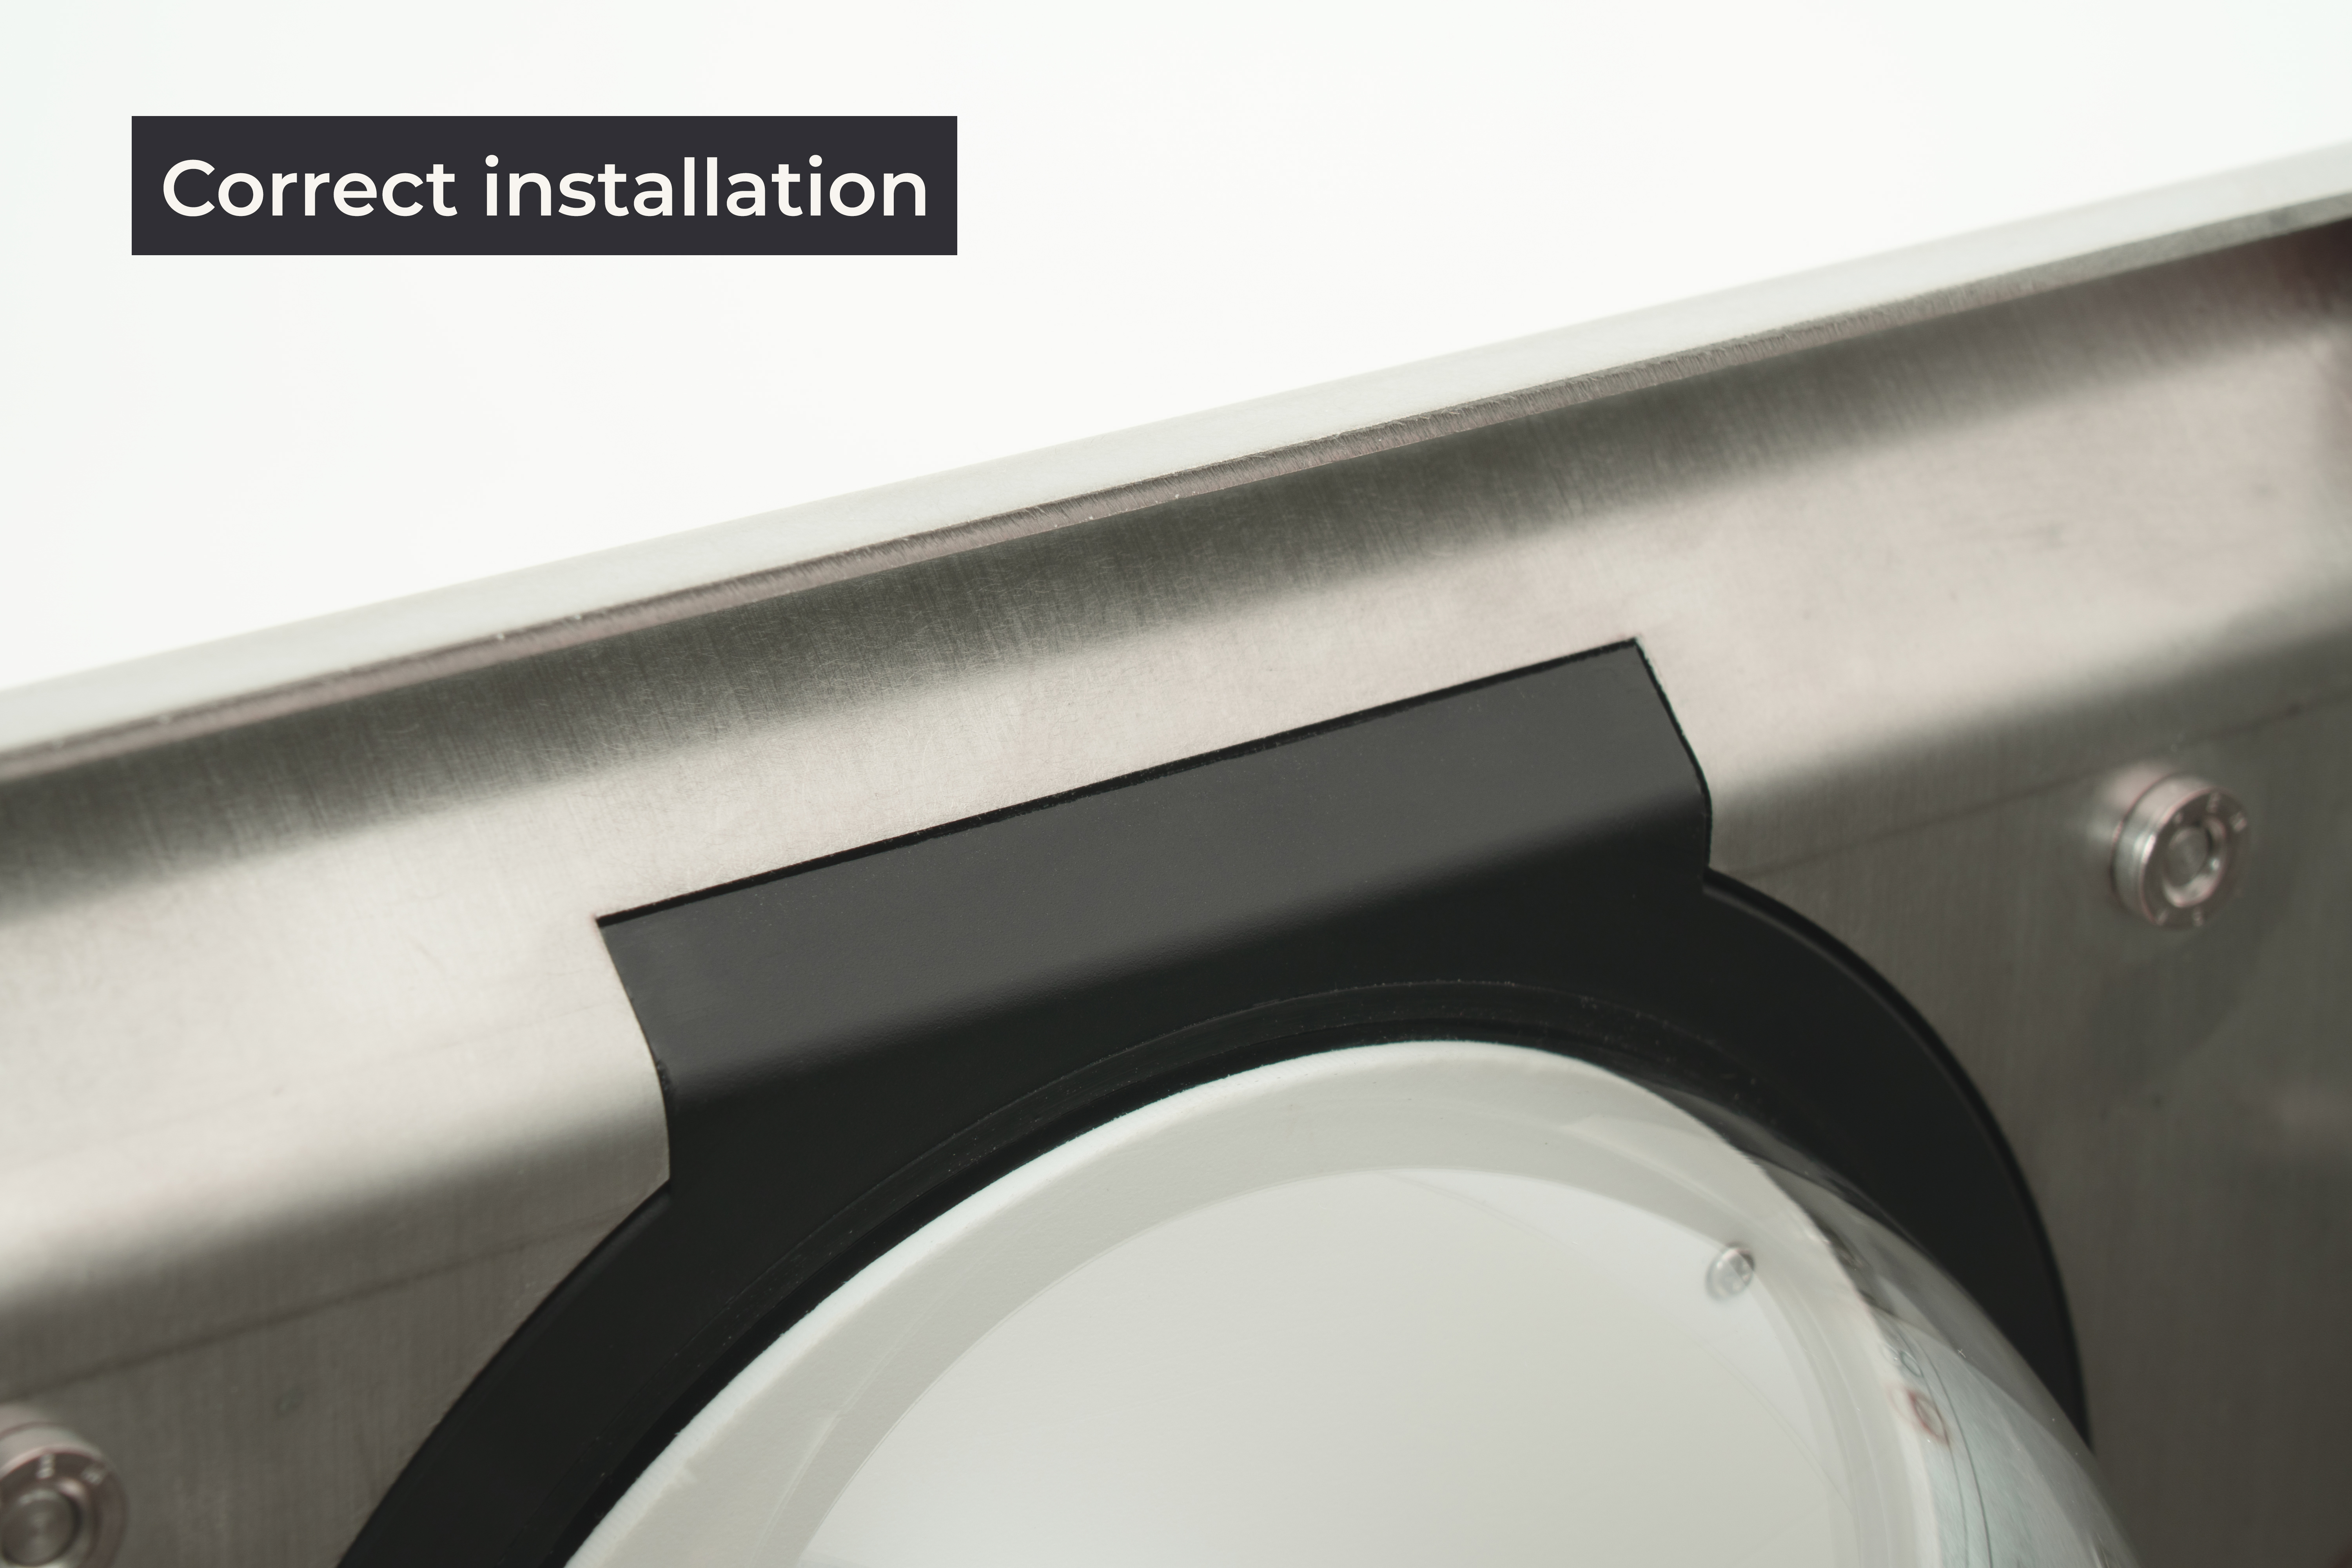
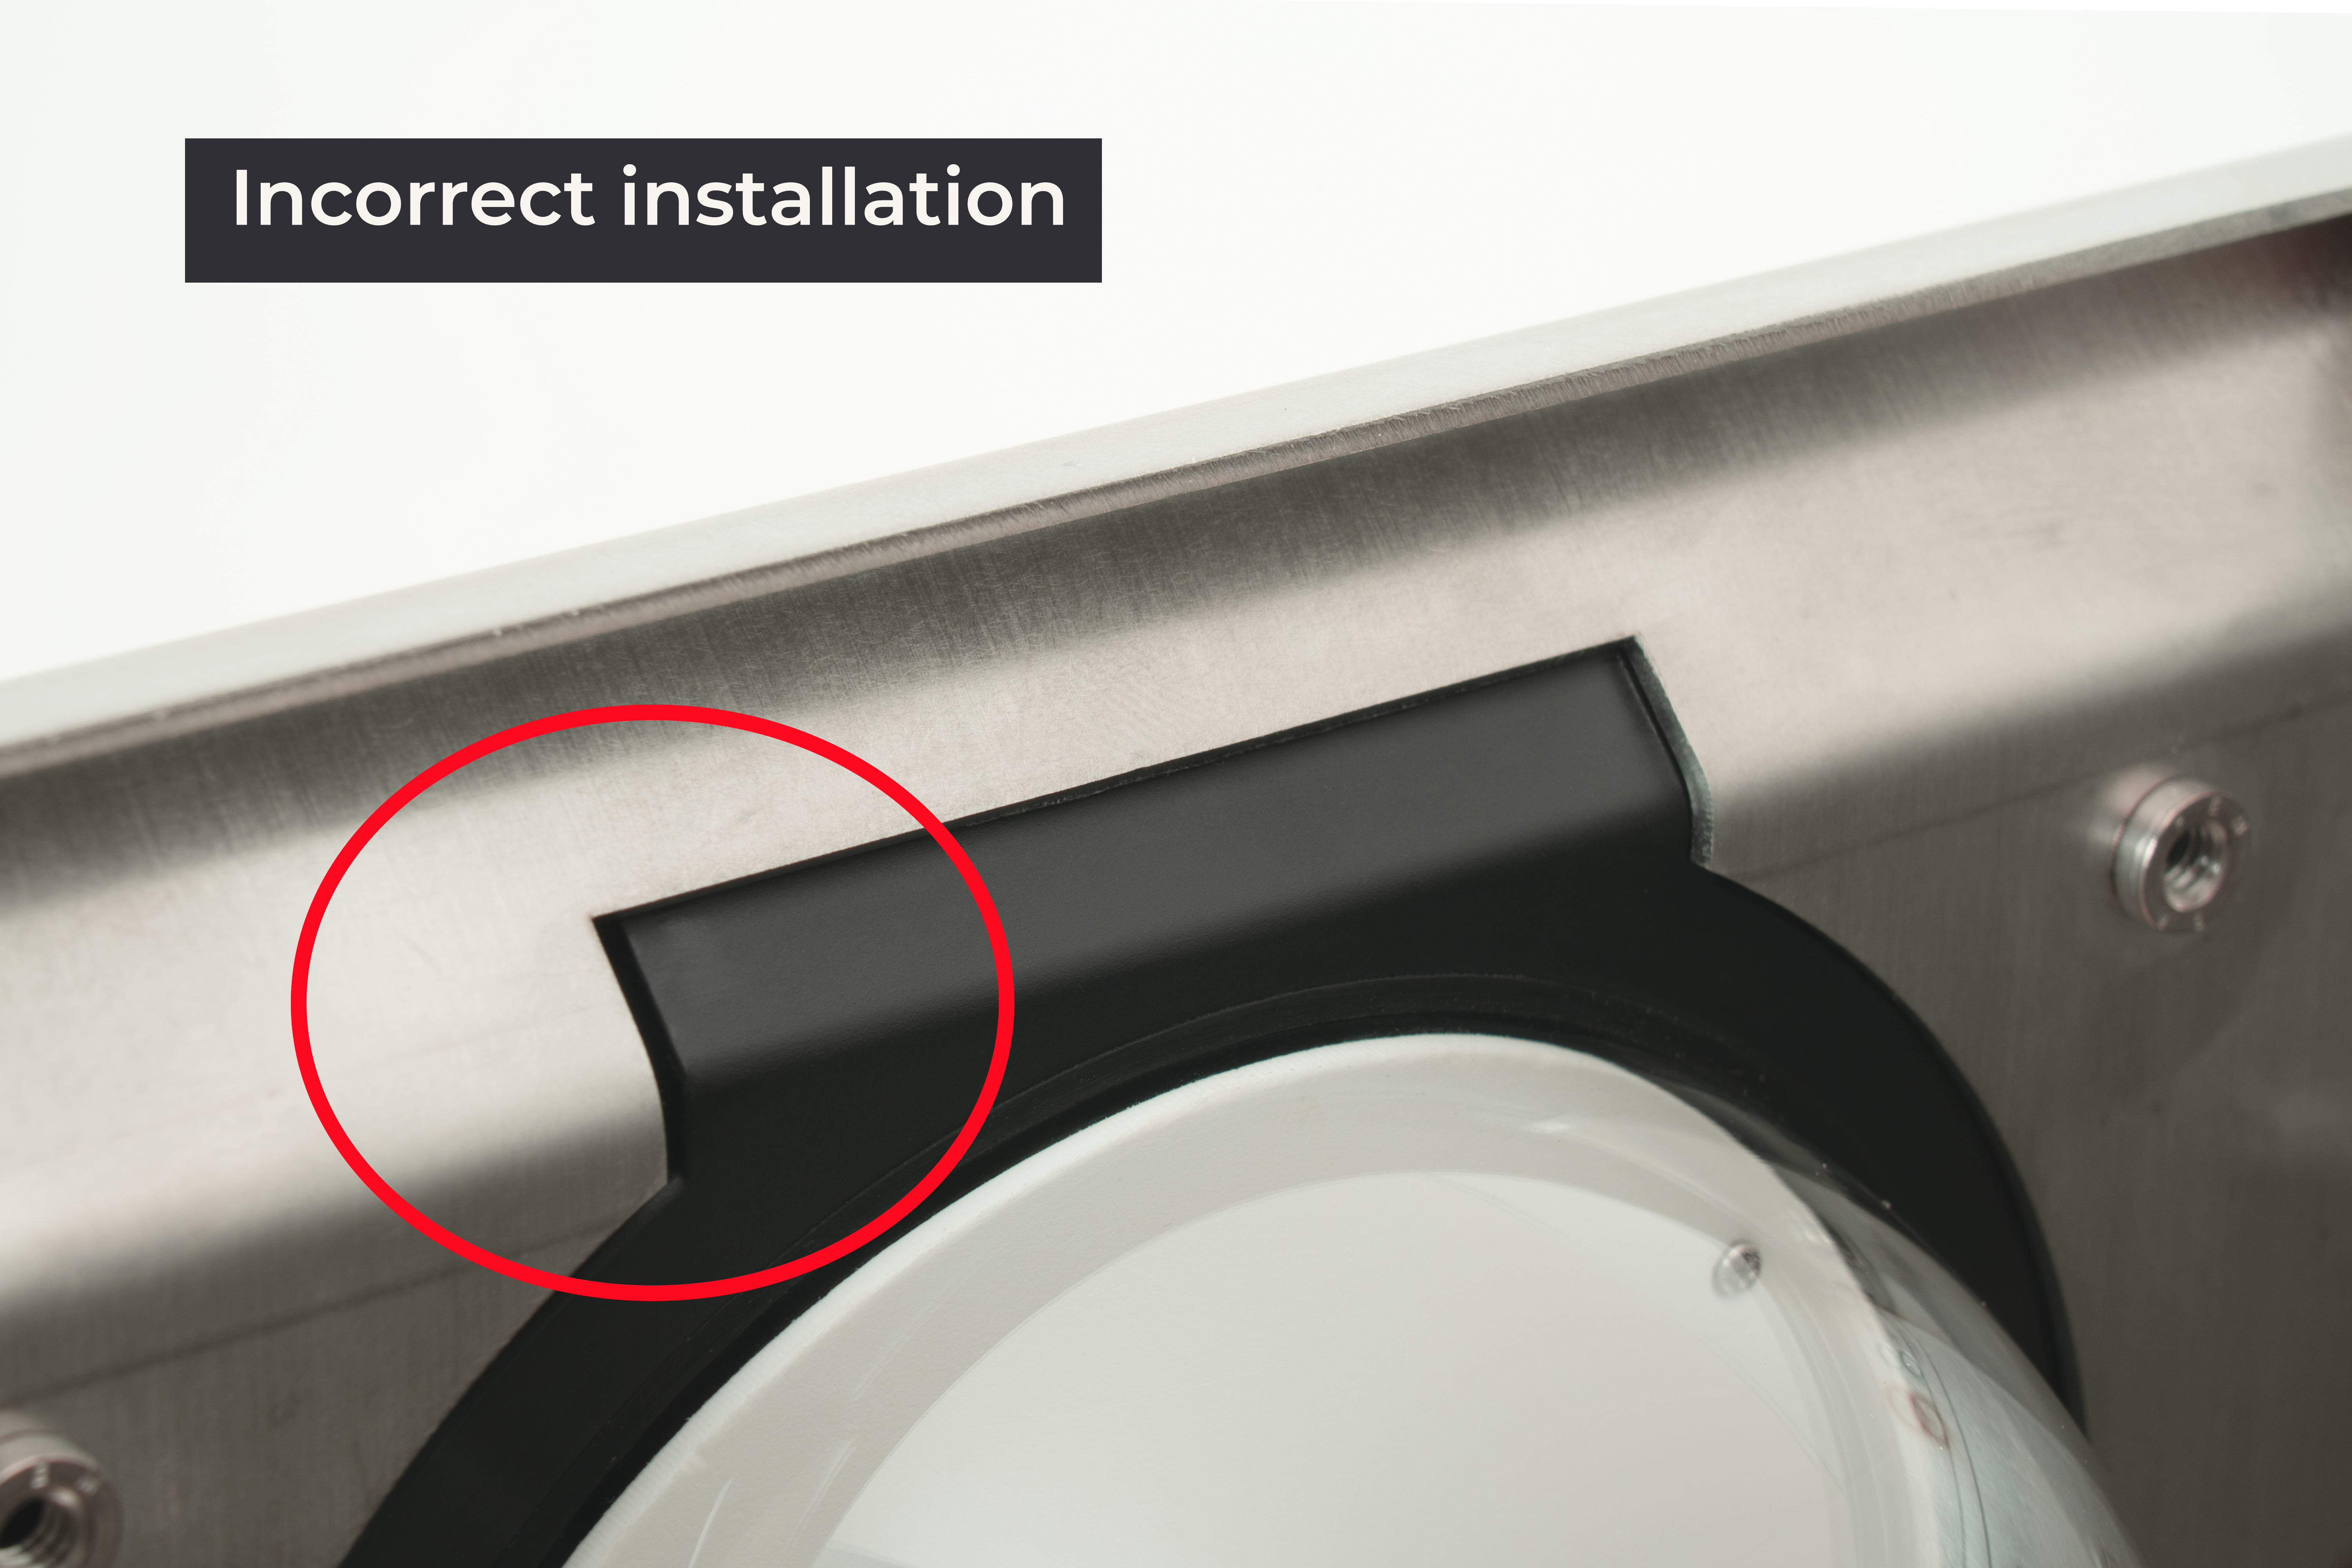
- Check the alignment of the SCiO Sensor in the test chamber. When properly aligned, the square portion of the sensor inserts fully through the sheet metal and the sensor plastic is flush with the inside of the sheet metal and is not recessed.
For more information on troubleshooting the SCiO Sensor from Mirus, refer to the Mirus for H2/H3 Classic GrainGage User Guide.
Correct Limit Switch Error Message
If you receive a limit switch error message in Mirus for the top or bottom gate, check the air pressure and the functionality of the gate. For more information about checking the air pressure, see Install a Pressurized Air Supply.
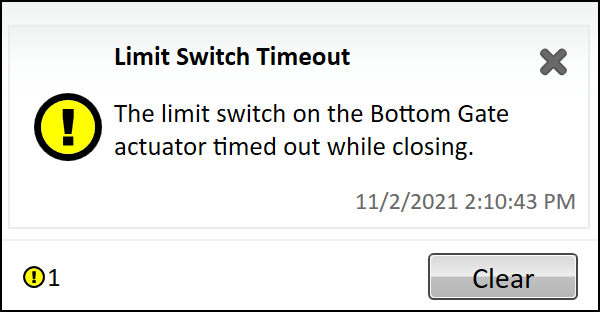
If the gate is uninhibited and the air pressure is correct, adjust the limit switches.
Adjust Bottom Gate Limit Switch
To adjust the bottom gate limit switch,
- Ensure the bottom gate is closed.
- Use a small flat head screwdriver to loosen the screw of the limit switch.
- Move the limit switch toward the test chamber. After the light turns on, move the limit switch an additional quarter inch until the light turns off.
- Tighten the limit switch screw.
- Use Mirus to open and close the bottom gate. Then, verify the limit switch notification is gone. (For more information, see Check Actuator Diagnostics.)
If you are still receiving the notification, contact a HarvestMaster Field Service Engineer.
Adjust Top Gate Limit Switch
To adjust the top gate limit switch,
- Ensure the top gate is closed.
- Use a small flathead screwdriver to loosen the screw of the limit switch.
- Slide the band behind the rivet to ensure the limit switch is as far down as it will go.
- Tighten the limit switch screw.
- Use Mirus to open and close the top gate. Verify the limit switch notification is gone. (See Check Actuator Diagnostics.)
If you are still receiving the notification, contact a HarvestMaster Field Service Engineer.
Diagnose Air Leaking from Solenoid or Cylinders
If you can hear air coming from the solenoid, you may need to replace the solenoid or cylinders. To determine whether a solenoid or cylinder needs to be replaced,
- Turn on the air and identify which solenoid is leaking air.
- Follow the air hoses from the leaking solenoid to its cylinder(s).
- Remove the non-pressure hose from the cylinder(s).
- Listen to see whether the air has stopped leaking from the solenoid and is now leaking from the cylinder(s).
- If air is leaking from the non-pressurized side of the cylinder, the air leak is in the cylinder.
- If air continues to leak from the solenoid after the hose is removed, the air leak is in the solenoid.
- Replace the leaking part(s).
For more information, see Replace the Solenoid and Replace the Gate Air Cylinders.