Maintain the GrainGage
Clean and Maintain the System
Periodic cleaning and regular maintenance of your GrainGage will assure excellent performance. HarvestMaster field technicians and engineers can come to you and perform a full system calibration and inspection before the harvest season begins.
To clean and maintain the H2 or H3 Classic GrainGage,
- Perform daily system checks before you begin harvesting.
- Perform system cleaning and protective measures at the end of season.
- About a month before the harvest season, perform (or have a HarvestMaster Field Engineer perform) a thorough system inspection, which includes checking all cables for mice damage, replacing worn parts, calibrating the system, and checking the measurement diagnostics in Mirus. (See Inspect the GrainGage.)
- If using a SCiO Sensor, perform a SCiO NIR Sensor Self Test in at the beginning and middle of each harvest season. (Refer to "SCiO NIR Sensor Self Test" in the Mirus for H2/H3 Classic GrainGage User Guide.)
For optimum system service and longevity, HarvestMaster offers service plans.
Perform Daily System Checks
Inspect Cables and Air Supply Tubing
Remove the rear chassis door to view the pneumatic air valves and the DSP module. Ensure the cables and air tubing do not interfere with the slide gates or test chamber. Ensure the air supply tubing and instrumentation wiring between the chassis and the test chamber do not rub on anything when the door is in place.
Check Plot Bucket Alignment
Ensure the four plot bucket anchor pins are aligned through the load cell support frame (two resting points above each load cell). Any bumps in the road during transport on a truck can move the hopper up and out of these supports. For accurate weight measurements, the plot bucket must be in its proper operating position.
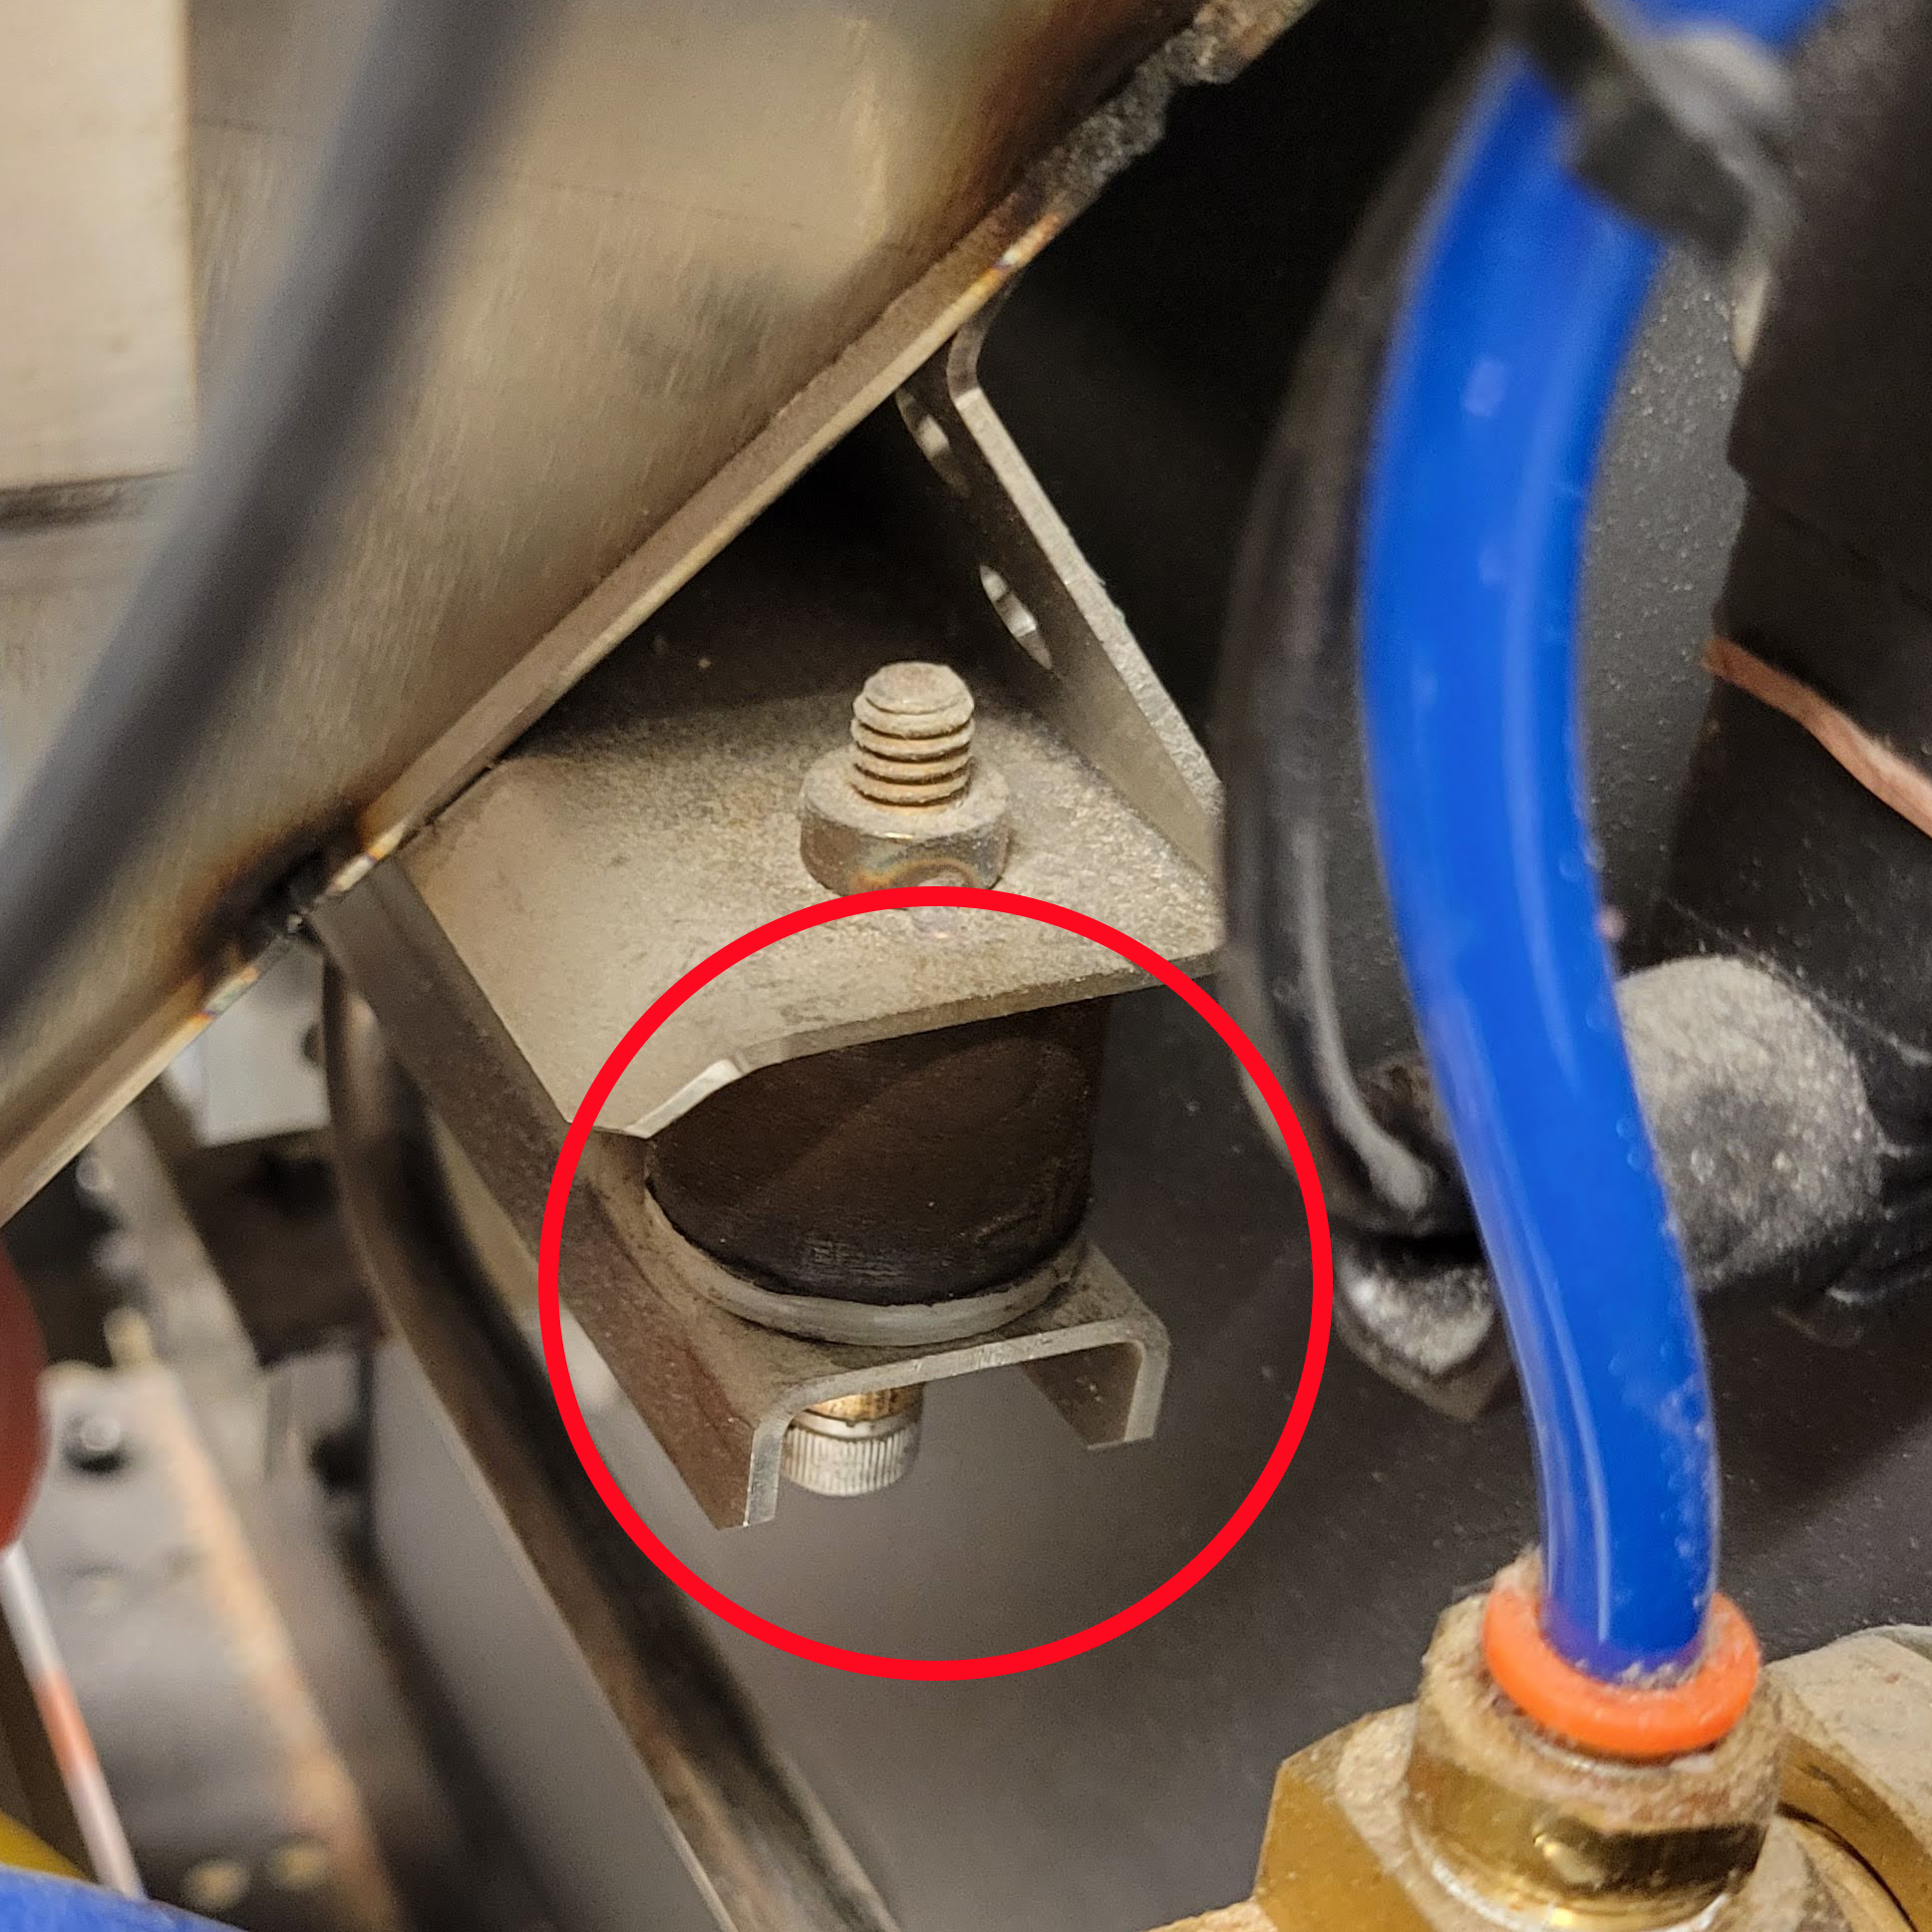 |
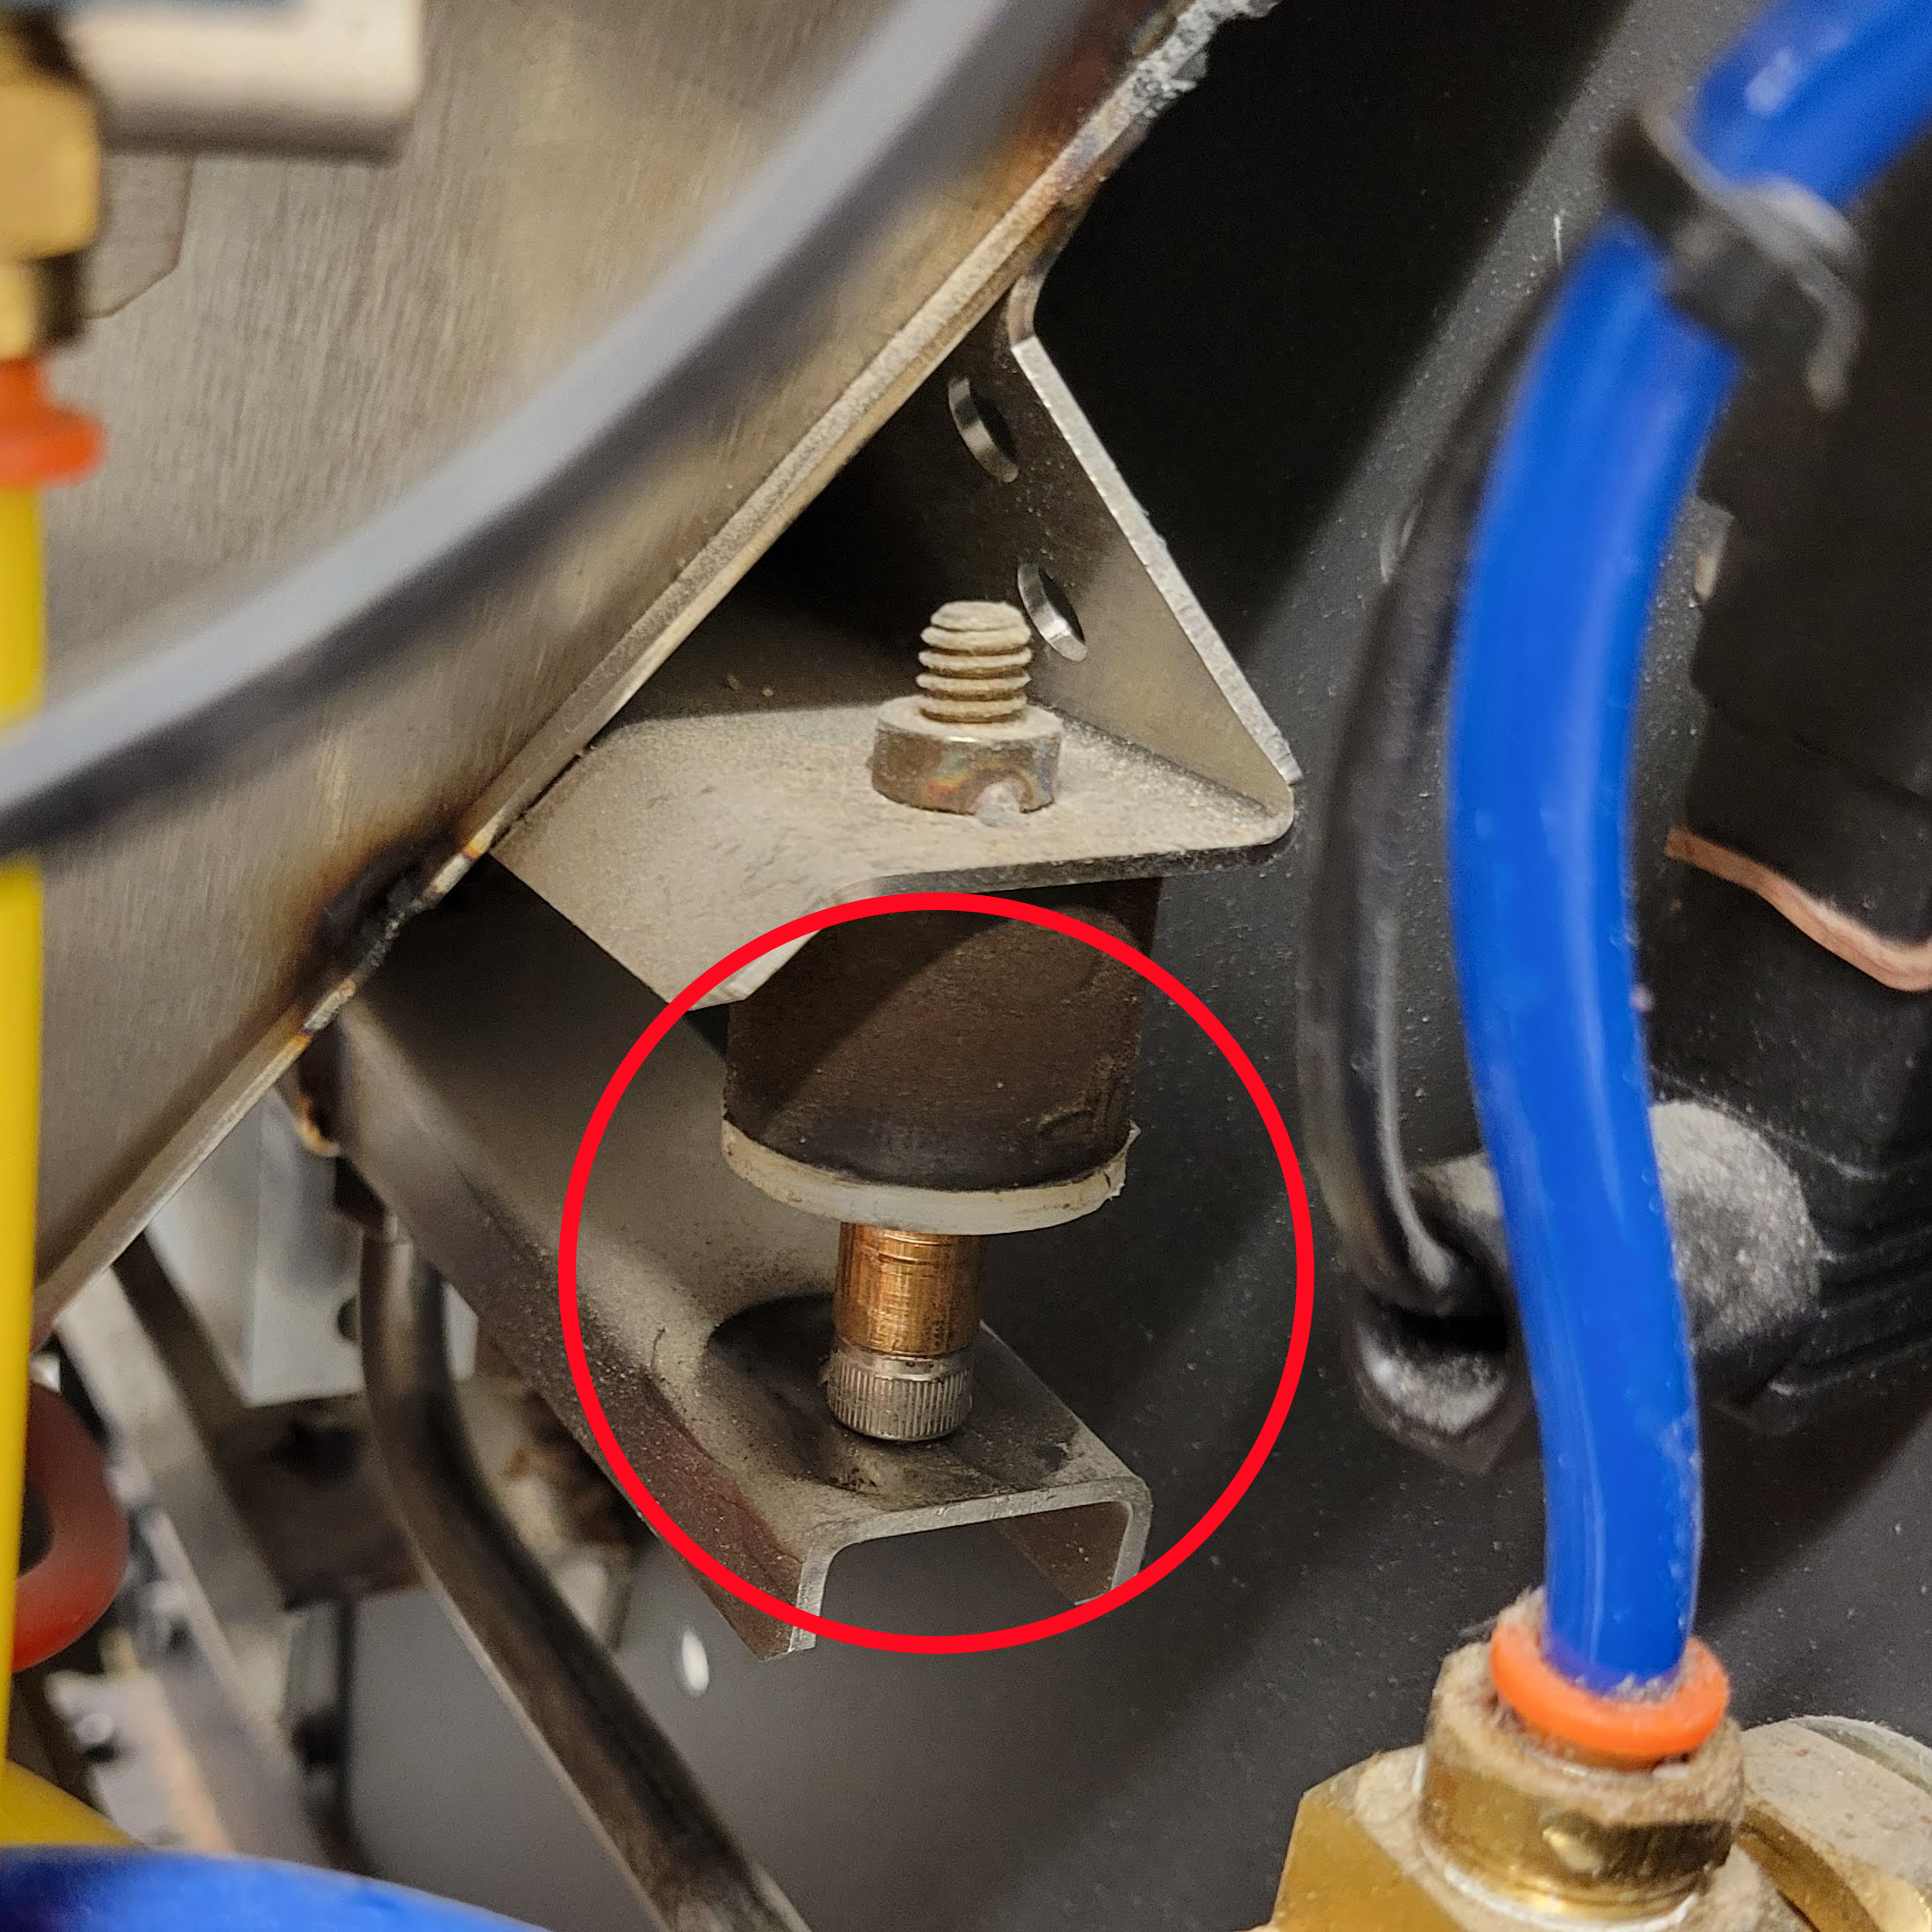 |
| Aligned | Misaligned |
Clean the GrainGage
Use a pressurized air to blow off excess dust, chaff, or trash that has accumulated on all surfaces.
For debris/buildup that cannot be removed by pressurized air, use a grease removing dish soap, such as Dawn, and warm water. If you need something stronger, HarvestMaster recommends Extreme Simple Green Aircraft & Precision Cleaner, which is advertised as safe on metals, plastics, and rubber.
![]() CAUTION: Clean the air cylinder rods with a dry lube only. Do not use dish soap or cleaner.
CAUTION: Clean the air cylinder rods with a dry lube only. Do not use dish soap or cleaner.
Check the Weigh Bucket
Use the calibration weight (included with your GrainGage system) to check the weigh bucket reading. The calibration weight is stamped with its value.
To check the weigh bucket reading,
- Turn on the combine.
- Remove the GrainGage access panel on the air supply side.
- Note the horizontal bar just below the load cell on either side of the plot bucket.
- Place the calibration weight on the load cell bar.
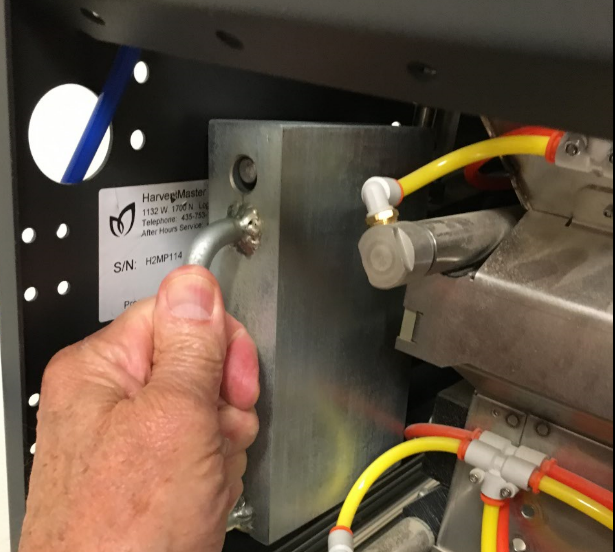
- Check the Weight value on the Diagnostics screen in Mirus.
- If the reading is within 0.02 lb (.01 kg) of the weight stamped on the calibration weight, the system is operating within its specified range.
- If the reading is within 0.05 lb (.02 kg) of the weight stamped on the calibration weight, press down on the plot bucket. If the reading remains too high or too low, look for objects interfering with the movement of the plot bucket. Check for cables or air lines that may need to be re-tied.
- If the weight reading is still inaccurate, refer to Appendix B: Troubleshooting.
Check the Chamber Weight
To check the chamber weight,
- Hang the (smaller) calibration test weight from the weight hanger on the test chamber.
- Check the Weight value on the Diagnostics screen in Mirus. The value should be close to the value stamped on the calibration weight.
- Re-calibrate the chamber if the weight value is not within .05 lb (23 g) with the combine and thresher on and .02 lb (9 g) when the combine is off. (To re-calibrate the test weight, see "Calibrate Test Weight" in the Mirus for H2/H3 Classic GrainGage User Guide.)
Clean the Glass Dome for the SCiO Sensor (H3 Only)
Clean the glass dome on the SCiO Sensor with glass cleaner and a non-abrasive microfiber cloth.
Drain the Pneumatic Air Prep (Regulator)
At the end of each harvest day, drain the pneumatic air prep (regulator).
To drain the pneumatic air prep,
- Twist open the drain located on the bottom of the pneumatic air prep.
- Let the collected fluid drain out.
- Twist the drain closed.
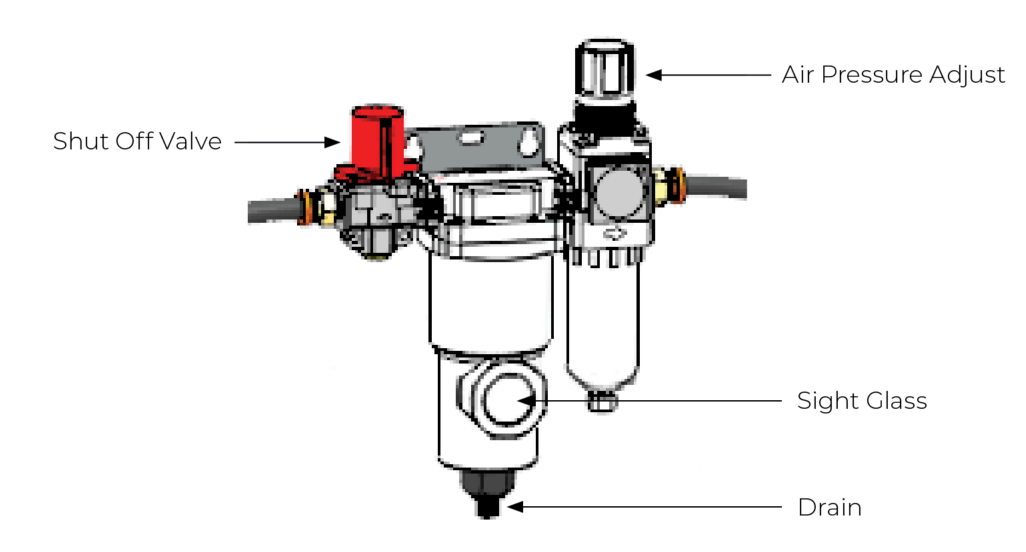
Note: To adjust the air pressure, pull up and turn. To adjust the shut off valve, press down and turn.
Perform End-of-Season Maintenance
After the end of the harvest season, complete the following tasks to prepare your system for storage.
- Clean the entire GrainGage, including the gates and slides, with high pressure air.
- Check the battery and system power cables. Clean and replace if necessary.
- If using the EM sensor, clean the EM moisture blade.
- If using the SCiO Sensor, clean the glass dome on the SCiO Sensor with glass cleaner and a non-abrasive microfiber cloth.
- Inspect rubber ISO mounts for cracks or damage. Replace if necessary.
- Check and clean the intake filters for the compressor. HarvestMaster recommends changing the intake filters annually.
- Lubricate the gates with a dry film lubricant that is safe for Nitrile seals.
- Use products, such as paste, dryer sheets, or mothballs, to repel rodents from the equipment. Place odor repellents near the wiring harnesses inside the GrainGage and in the cab. Fresh Cab Rodent Repellent repels rodents and is safe for pets. Ensure these products are not placed in locations that could interfere with the GrainGage's operation.
Prepare for Welding or Jumping the Battery on Combine
To avoid damage, unplug the power cable for each GrainGage module and the system controller in the cab before welding on the combine or jumping/boosting the combine battery.
![]() CAUTION: Although HarvestMaster electronics are protected against power overload, damage may occur if the modules and system controller are plugged in while welding on the machine or jumping the combine battery.
CAUTION: Although HarvestMaster electronics are protected against power overload, damage may occur if the modules and system controller are plugged in while welding on the machine or jumping the combine battery.